
people have asked me how to overlay images, so i thought i would make a blog post about it :D
i got the idea from THIS image! i couldn't find the artist so i just screen printed it.
i got the idea from THIS image! i couldn't find the artist so i just screen printed it.
it's actually very simple. (you'll need a mild amount of photoshop knowledge to do this, for people who use photoshop to edit their photos - this is a snap) note: this is the way I do it. it is not the only way and you don't have to follow it word for word. just a guideline for those who asked me.
this doesn't have to be a city image, you can use whatever you want really :) don't be afraid to experiment. and if you fail, just delete it and try again ;)
let's begin *cue music*
1. first off, start off with your image. it can be any kind of image - but i like using portraits. you can use any image that has a pretty plain background and a strong focal point. don't choose pictures that have a bunch of dark big objects in the background - it'll get distracting.
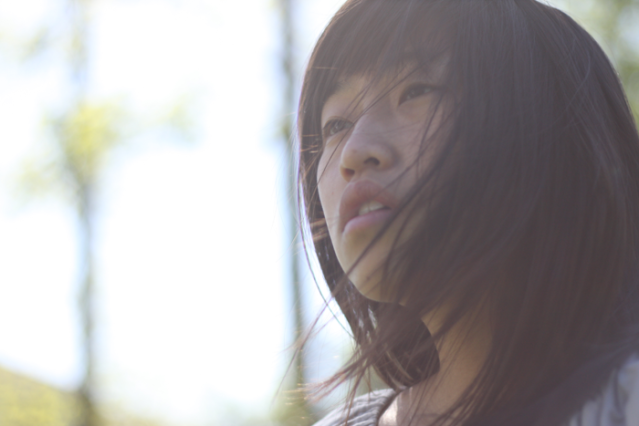
EXAMPLE: i'm going to use two photos from anna szczekutowicz as an example or YES and NO. click to go to her page.

this would be a no, because the background has too much stuff. (but it's a beautiful image, nevertheless :D)

this would be a yes. it has a plain white background (if the background is not white, you can easily white it out with a strong gradient map) and a single "focal" point. and if you can't fully white it out (like the image i used) just go over it with a brush :)
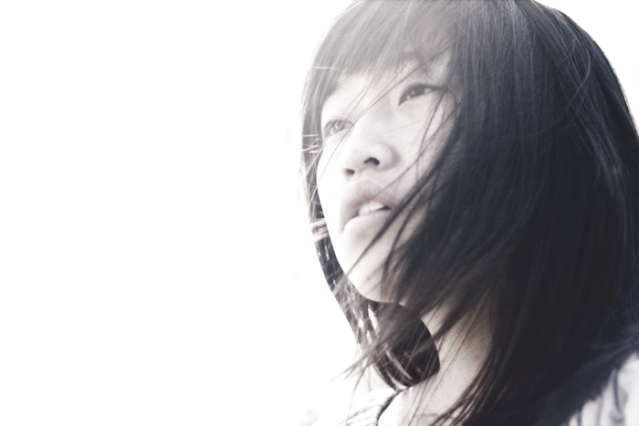
2. turn it into a black and white. it doesn't have to be 100% bw (as you can tell, there is a bit of color) but get it as unsaturated as possible. if your city image tends to be dark, make your image lighter. (you can always adjust it at the end though) i like using gradient maps to get my black and white.

3. pick out your city image. or choose any image with a lot of action and a lot of colors. opposite of what you chose for your bw image. the more exciting, the better!
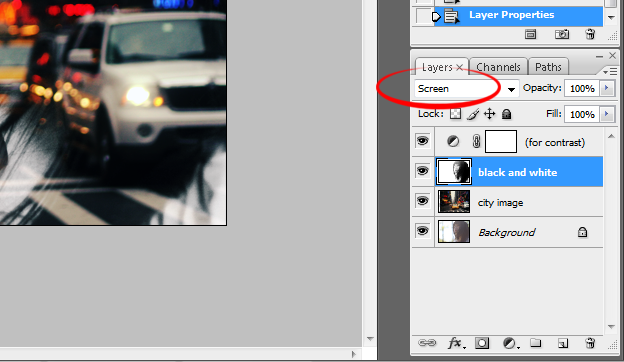
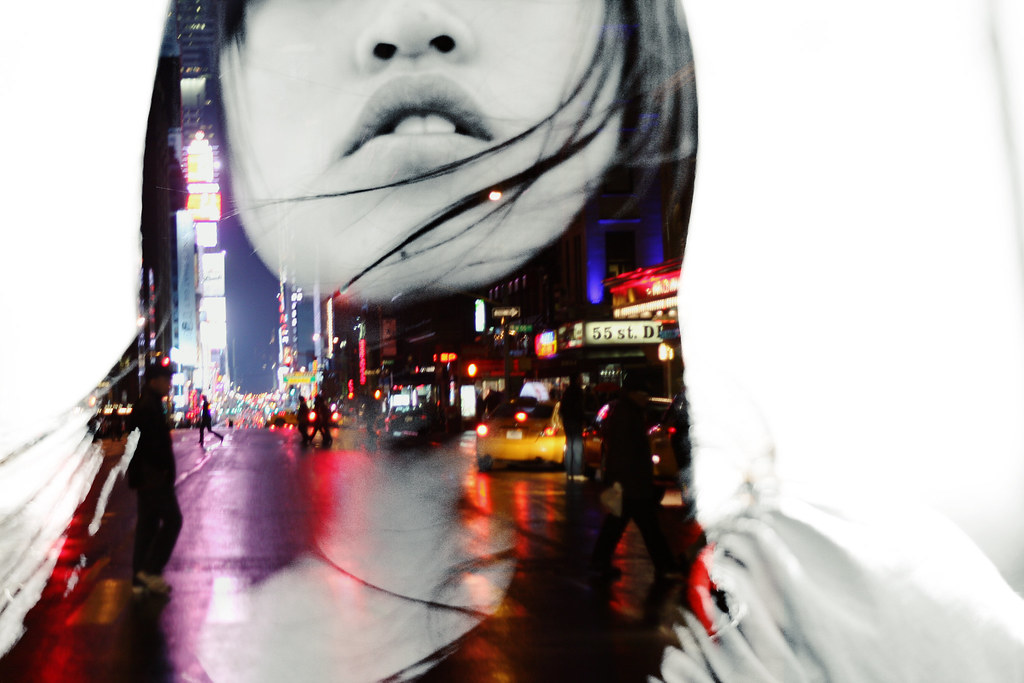
4. now for this step, for those who already are quite handy with photoshop - adjust your layers until it resembles this. city image, bw image on screen.
but i'll break it down for the rest of ya'll. ( i named the layers for your convenience :D)
* merge together your image into one layer so you have your bw portrait.
* click and drag or copy the city image (or whatever image you chose) onto this image and drag it UNDER the bw layer.
* set the portrait on screen, then voila!
(note about SCREEN: screen is something that brightens and image usually and it cancels OUT the black. so darken the parts of the image you want "city-fied" to get the best effect. understand?)
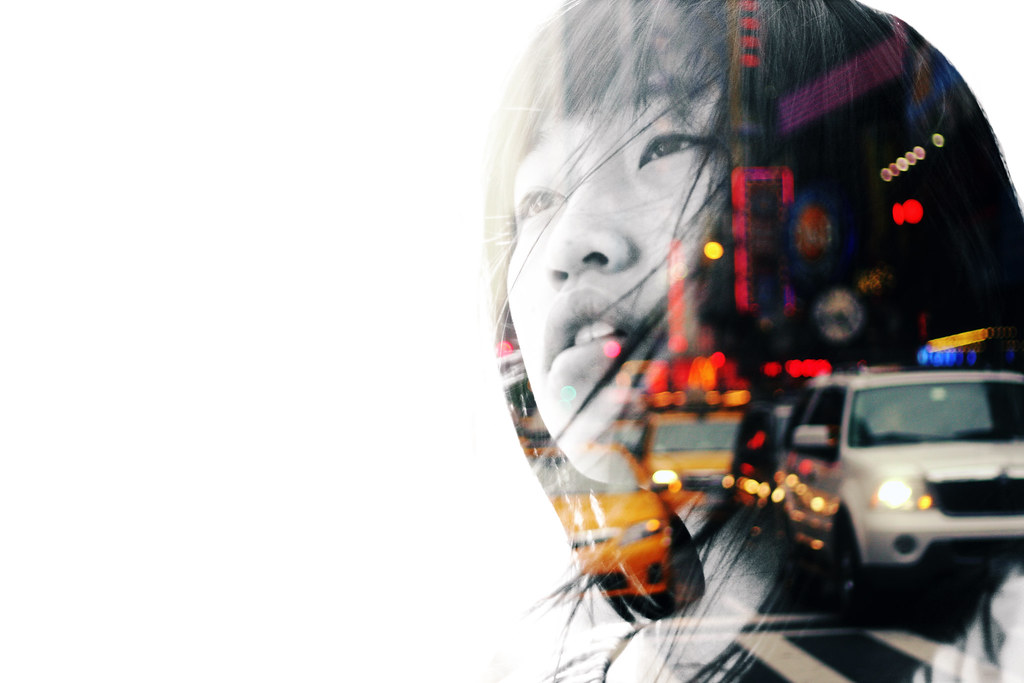
*IMPORTANT*
you can also put the city image on top as well. (then the city photo would be on screen) but with this, you might have to make your bw photo darker. the ups to this way is that you can erase parts of the city.
*IMPORTANT*
you can also put the city image on top as well. (then the city photo would be on screen) but with this, you might have to make your bw photo darker. the ups to this way is that you can erase parts of the city.
5. this step is optional. i like to add a layer of curves to tie the whole image together and give it a boost of contrast.
remember to just let loose and play around with this. you can get a little funkier and erase parts of the city so it's only on the hair (for ex) of the image.
then you are done! yayyyy. if you used this, i would love to see what your results are. comment if you have any questions and if you want more tutorials like this :D
YOU ARE THE BEST!!!!!!!!! YOU ARE!
ReplyDeletethanks so much for sharing this, I didn't dare ask you ^^'
this is AWESOME! thanks, thanks, thanks a million
hey thanks so much for posting the tutorial and i love your photography. anyways i tried it out and it turned out okayish but i like yours better :D it would be awesome if you wanted to see it haha. its on deviantart or
ReplyDeleteblogg thanks a bunchh
Great tutorial!
ReplyDeleteHave many things to experiment with now. :)
My work following this tutorial:
ReplyDeletehttp://twitpic.com/1pcehp
The tutorial need more images
ReplyDeleteThis is just great!
ReplyDeleteooh great tutorial! really cool effect :D
ReplyDeletex amie
http://heartbeats-intimidation.blogspot.com
that's hot!! thanks for the tut!!!
ReplyDeletegreat tutorial!~
ReplyDeleteStumbled across this when browsing flickr.
I liked it so much that I had to experiment.
My first attempt is on tumblr, let me know what you think ^-^/
http://natulcien.tumblr.com/
i followed your tutorial..
ReplyDeleteand it came out awesome!!!
thank you so much!!!
so this is my attempt
http://www.flickr.com/photos/umairlovato/5059033641/
i loved them all <3
ReplyDelete